Key Techniques
- AI behavior trees with patrol and detection states
- Persistent save system with state serialization
- Dynamic and reactive enemy spawning
- Custom lighting and materials for horror atmosphere
- Seamless texture tiling based on world space
Selected Contributions:
I handled the core technical systems that required either deep Unreal knowledge or complex algorithmic solutions. These contributions formed the foundation other team members built upon.
Save/Load System:
- Player progress, battery life, object, and level time as well as states of pickups, doors, and enemies tracked
- Save and quit functionality with a main menu continue button
- Best completion time persistent for replayability
Implemented a persistent save system using Unreal's SaveGame framework with custom serialization for game state. The system tracks player progress, battery life, and current level time, along with the states of pickups, doors, enemies, and puzzle completion across sessions. It will alse keep a best time to run against in future runs. The main menu features a "Continue" button that deserializes the last save and restores the exact game state, including enemy positions and patrol routes. This required careful management to ensure spawned enemies could be properly restored without breaking navigation or AI behavior.
Texture Tiling:
- Tri-planar projection for true seamless tiling
- Noise-based color blending
- Seamless, natural textures across objects of varied scales
This was easily the most difficult to implement. Unreal expects all static meshes to work with UV’s tailored to the mesh, and utilizing square textures with the expectation of automatic tiling, like is done in other engines, will not always work, unless the object’s size is static and all instances of that object match. When utilizing texture coordinates on the meshes to account for scale and when properly flipping the U and V to account for this, the issue of disconnected objects that are adjacent to each other not being seamless appeared. The collective fix for this was to utilize tri-planar projection on the materials that are used for the architecture. This solved all seaming issues by tiling all the objects based on the world space position and vertex normals of each polygon. This output was further upgraded by adding micro and macro color variation through noise-based blending to further disguise so much of the visible space being 3 textures. The use of these algorithms can be found in the material shaders in M_Perimeter and M_Hedge.
Cross section of 3 different objects of different scales adjacent to each other with the same material and no seams to be found
Semi-Random Enemy Spawning:
- Determines player quadrant, spawns in same point in diagonal quadrant and uses NavMesh to spawn in navigable point
- Timed spawns as well as deliberate event-driven spawns
- Always spawn out of view, won't immediately kill player, and always have valid nav paths
The problems of random enemy spawning, aside from trying to avoid needing to animate the enemy spawning if the player could see it, mostly come from considering player experience in terms of ensuring the game felt fun to play. As an example, if the enemies were to spawn on top of or right next to the player, the experience would feel random and unfair. The solution to this was to find the central vector of the main portion of the maze to compare against the player location vector to spawn an enemy where the player couldn’t see and where the enemy couldn’t immediately kill them. This is done by checking for which quadrant the player is in, then either adding or subtracting half of the maze height and half of the maze width to the players x and y respectively to create an enemy spawn location x and y that is in the diagonal quadrant to the player. The vector created is then used as a central point around a spherical radius to spawn an enemy at a point in which the enemy is allowed to traverse to ensure that it is a valid spawn point for enemy. This navigable range is defined by the navigation mesh and Unreal’s built in AI navigation system. This can be seen in BP_EnemySpawner in the TimedSpawn function.
Enemy AI and Damage System:
- Search last known palyer location after losing sight
- Reduced preception sensitivity when player is crouching
- Diagetic health system
The decision making of the enemies is utilizing Unreal’s Behavior Tree, Blackboard, and AIPerception components to define enemy behavior dynamically and per enemy instance. This is done by creating tasks for the enemy to do, which will be done if all blackboard flags are set to true during the behavior tree’s check. Some of the dynamic behavior of the enemies that may go unnoticed are that the enemies, after losing track of the player, will patrol in the last area the player was seen in a random radius, and that the enemies have a drastically lower ability to sense the player when the player is crouching. While the damage to player is very simple and needs no explanation, the enemy damage is a little bit more. It utilizes scalar parameters within dynamic material instance to have the enemy grow more red over 10 .1 second ticks, as a way of keeping a health notification without being non diagetic.
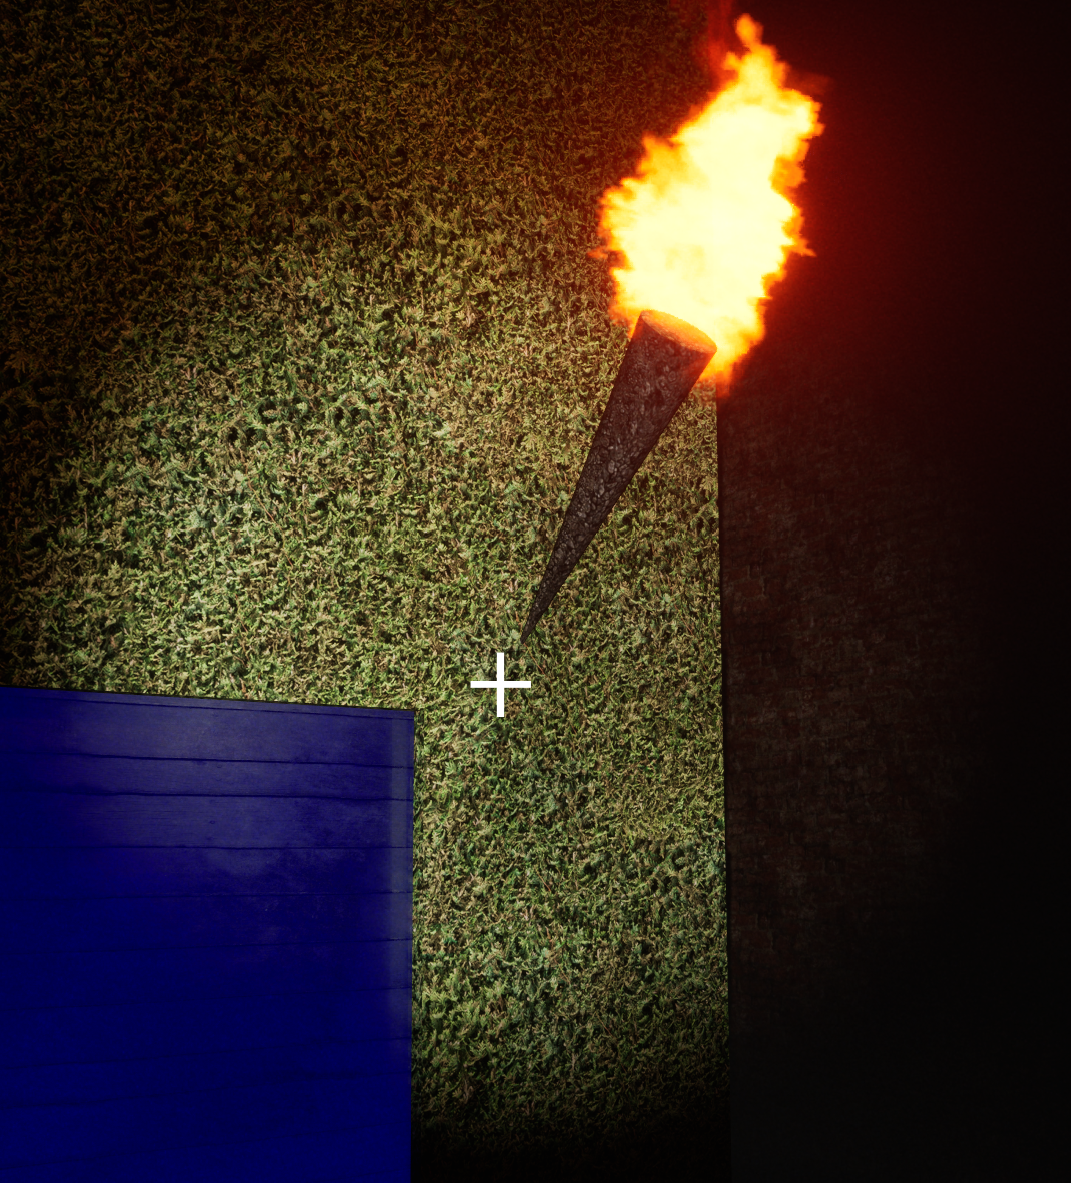
Lighting and post processing:
- Avoid global post-process volumes and rely on camera-based post-processing
- Use fog and exposure to keep with genre standards while maintaining readability
- Hidden point lights to avoid distance-based exposure artifacts
Lighting is nearly always pivotal in making a horror game. Initially, the plan I had for this environment was to remove any default, dealing with all post processing in the camera to save creating a separate post processing volume, use a thick ground fog, staying cheap by sticking to emissive lighting, and, lastly, have a massive light shine through the final door at the end to have a nice symbolic ending. While most of the initial ideas were kept, the results of the emissive torches were not great, the iteration to fix these results was agonizing, and at any exposure setting the lights would get brighter based on distance. While some of the emissives were kept (doors, pickups, enemies), the torches were reworked to now have no emissive and hiding a warmed-up point light in them. I knew the point lights were more expensive at run-time, but the draw distance and fading would clear up any of the exposure issues and lower that expense pretty heavily. Plus, the memory expense of the point lights was a price worth paying to make iteration easier while keeping the level dark when adjusting the fog. After that point it was down to finding what post processing would benefit the look. Which was decidedly minimal, by setting the cheapest exposure possible and adding a light film grain. All in all, I'm really proud with how the look of the game turned out, with no art or modeling knowledge amongst the team.
An example of the environment and lighting draw distance in action
Technical Leadership:
This was a team project for a graphics course with four other CS majors, but I was the only one with Unreal experience. Rather than dictate the project direction, I facilitated a brainstorming session where everyone pitched mechanics they found exciting. I then compiled these ideas into a scoped design document with realistic timelines and linked tutorials for each system for everyone to get their bearings.
Establishing Infrastructure:
Before any development started, I set up the technical foundation the team would need (all of which can be found in the repository):
- Version Control: Created documentation for Git, Git LFS, and Unreal's Blueprint diffing tools. Held a workshop on branching strategies and merge conflict resolution.
- Project Structure: Established folder conventions, naming schemes, and a style guide for Blueprint organization.
- Reference Implementations: Built several mechanics at varying complexity levels as "known-good" examples demonstrating best practices for blueprints and iteration in Unreal Engine
Mentorship & Code Quality:
As development progressed, my role shifted to technical support and quality assurance. I answered questions daily, linked relevant documentation and tutorials, and conducted informal code reviews. A recurring challenge was that my teammates, despite being CS majors, hadn't developed strong testing habits. I spent significant time debugging their contributions, which became an unexpected teaching opportunity. Rather than just fix issues, I'd walk them through my debugging process: isolating the problem, checking assumptions, using print statements strategically, and validating edge cases.
Task Distribution:
I took on the systems with the highest technical complexity or those requiring deep Unreal knowledge (AI behavior trees, world-space texture tiling, event-driven UI architecture, lighting, save serialization). This let teammates focus on more self-contained tasks while still contributing meaningfully. By project end, everyone had implemented at least one feature they could point to as "theirs," even if I'd refactored or debugged it significantly.
What I Learned:
- Documentation is always worth it: The upfront time spent on Git guides and reference implementations gave teammates a quick path to self-sufficience.
- Teaching debugging > fixing bugs: Walking someone through my thought process took longer initially but reduced repeat issues.
- Scope management is collaborative: Letting the team drive ideas created buy-in, even if I had to reign in scope afterward.
- Infrastructure matters: Good project structure and clear processes prevented chaos with 5 people editing Blueprints.
- CS education gap: Academic CS programs often don't emphasize skills I'd assumed were universal, like testing, debugging workflows, or version control.